About the technical side of the website renewal.
Tue Mar 04
In the last article, I explained why I renewed this website. In this article, I’m going to talk about the technical side of the renewal.
1. Deciding a website objective and choosing development tools
First, I set an objective for the new website to not blur the future direction. I also thought about the criteria for choosing the right tools.
- Website objective: To show my skills and thoughts
- It functions as a magazine, an inspiration source, and a CV
- Tool criteria
- Tools that let me practice using the modern webdev workflow to improve my skills and save production time.
- It must generate a static website. This way, I don’t have to worry about the security vulnerability of dynamic website platforms like WordPress.
Then, I chose the following tools to create a new website:
- Preparation tools
- Excalidraw
- An open-source whiteboard tool. It feels like pen and paper = less friction.
- This time, I used its Obsidian plugin to streamline my production flow.
- Figma
- A wireframing tool that I use regularly at work.
- Excalidraw
- Development tools
- Website generator: Astro
- A static website generator that is common nowadays, and many people say it makes personal website development easy.
- It has integrations with Git, GitHub, Netlify, Cloudflare, React, Tailwind CSS, and many more platforms and frameworks.
- I can utilize my knowledge of Hugo and Vue.JS, too.
- Astro allows HTML tags inside a .md file (which Hugo doesn’t).
- CSS framework: Tailwind CSS
- At work, I was surprised how it supports rapid CSS coding.
- It can make my website low-maintenance since it follows the technology advancements, and updates frequently.
- Code editor: Visual Studio Code
- With these extensions: WSL, Astro, Git Graph, and JavaScript Debugger Companion Extension
- Website generator: Astro
- Image creation tools
2. Preparation
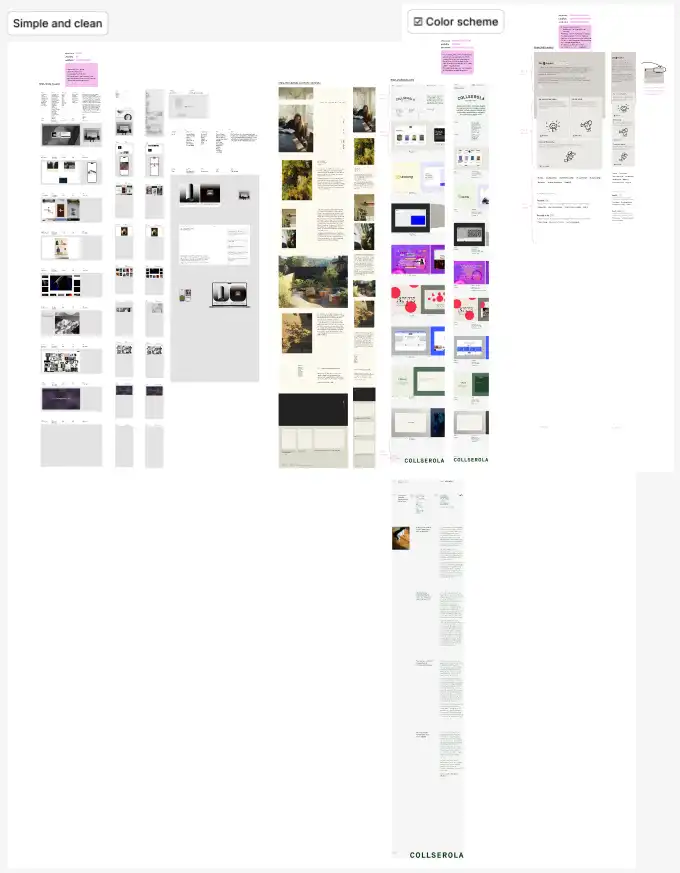
Getting inspired and informed
Since improving my web design/development knowledge and skills was one of my objectives, I started the production by gathering screenshots of multiple websites for inspiration and analysis.
I took notes on:
- structures
- visual approach to make their personal/professional brands of good design websites to find out what kind of design I want my website to have.
Also, I checked some YouTube videos for a better understanding of good web design.
- https://www.youtube.com/@AnthonySistilli/ (Roasting your portfolios series)
- https://www.youtube.com/@MalewiczHype (his design tutorials have good logical explanations)
Learning Astro with a step-by-step tutorial
Although I’m used to using HUGO (a static website generator) and Vue.JS, Astro was still a new website generator that I had to learn from the basics. To get the maximum effect from learning, for me, following a step-by-step tutorial was very helpful. (Bonus: I could use this sample website as a reusable template.)
3. Designing
1. Concept
I wanted to make the new website
- A place where viewers feel friendliness and a relaxing atmosphere, and my personality
- Updates frequently (no perfection)
- It can be an excuse, but I dropped the idea of building a perfect website from the beginning to overcome my inertia.
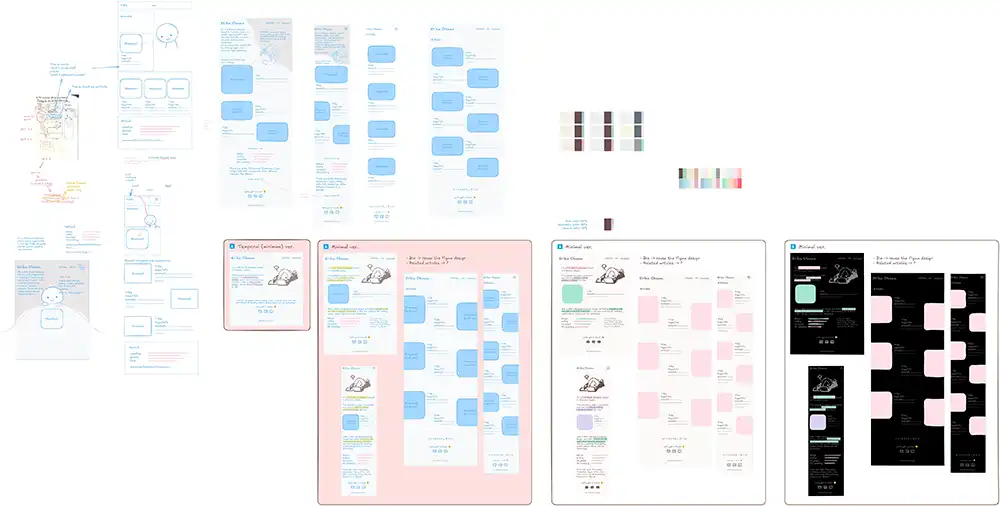
2. Rough sketching
The design process always starts with rough sketching. I used Excalidraw (and pen and paper) for this, and sketched structures of these pages:
- Index: summary of the website
- Articles: my thoughts, thinking style, and visual skills
- About: who I am, skills, and job history (CV)
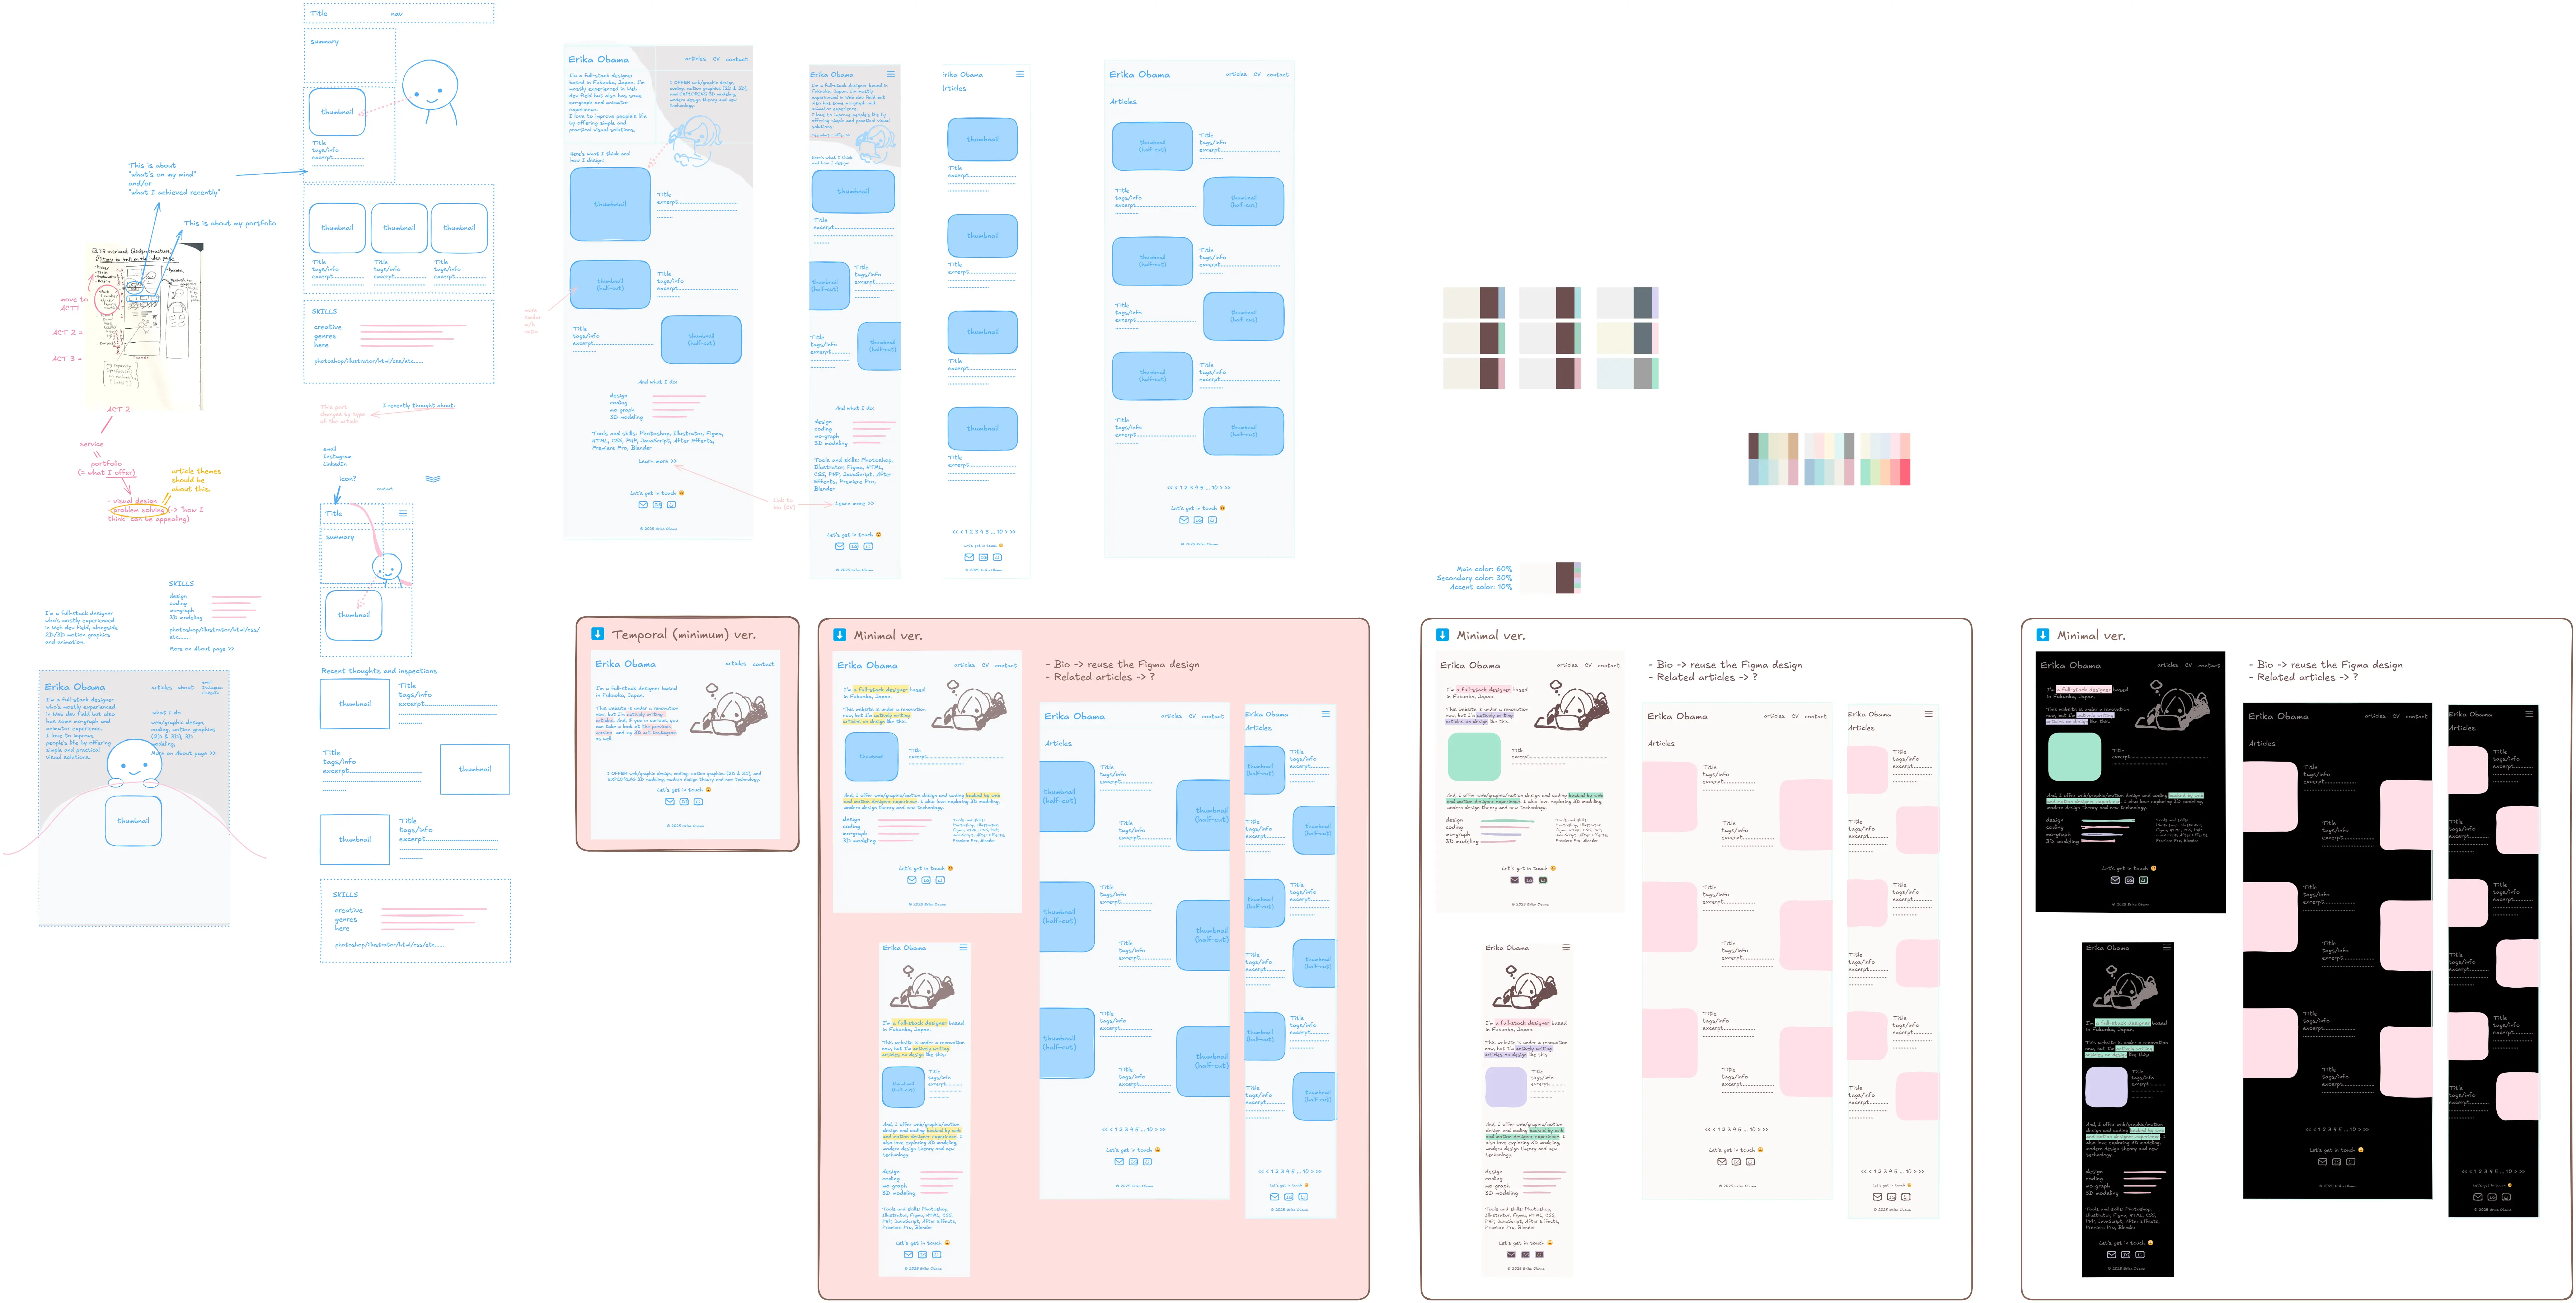
And, considered color schemes and font combinations, too.
- https://colormagic.app/ was very useful for testing different color combination patterns.
- For fonts, I considered using web fonts at first but found out that it takes too much resources just to load with Japanese web fonts. So, I ended up using the web-safe fonts below.
@font-face {
  font-family: 'heading';
  src: local("Futura"), local("Trebuchet MS"), local("ヒラギノ角ゴ ProN"), local("Hiragino Kaku Gothic ProN"), local("游ゴシック"), local("YuGothic"), local("Yu Gothic"), local("メイリオ"), local("Meiryo"), local("MS ゴシック"), local("MS Gothic"), local("HiraKakuProN-W3");
  font-weight: normal;
  font-style: normal;
  font-display: swap;
}
@font-face {
  font-family: 'reading';
  src: local("Andale Mono"), local("Consolas"), local("ヒラギノ角ゴ ProN"), local("Hiragino Kaku Gothic ProN"), local("游ゴシック"), local("YuGothic"), local("Yu Gothic"), local("メイリオ"), local("Meiryo"), local("MS ゴシック"), local("MS Gothic"), local("HiraKakuProN-W3");
  font-weight: normal;
  font-style: normal;
  font-display: swap;
}
3. Figma (to test the actual look)
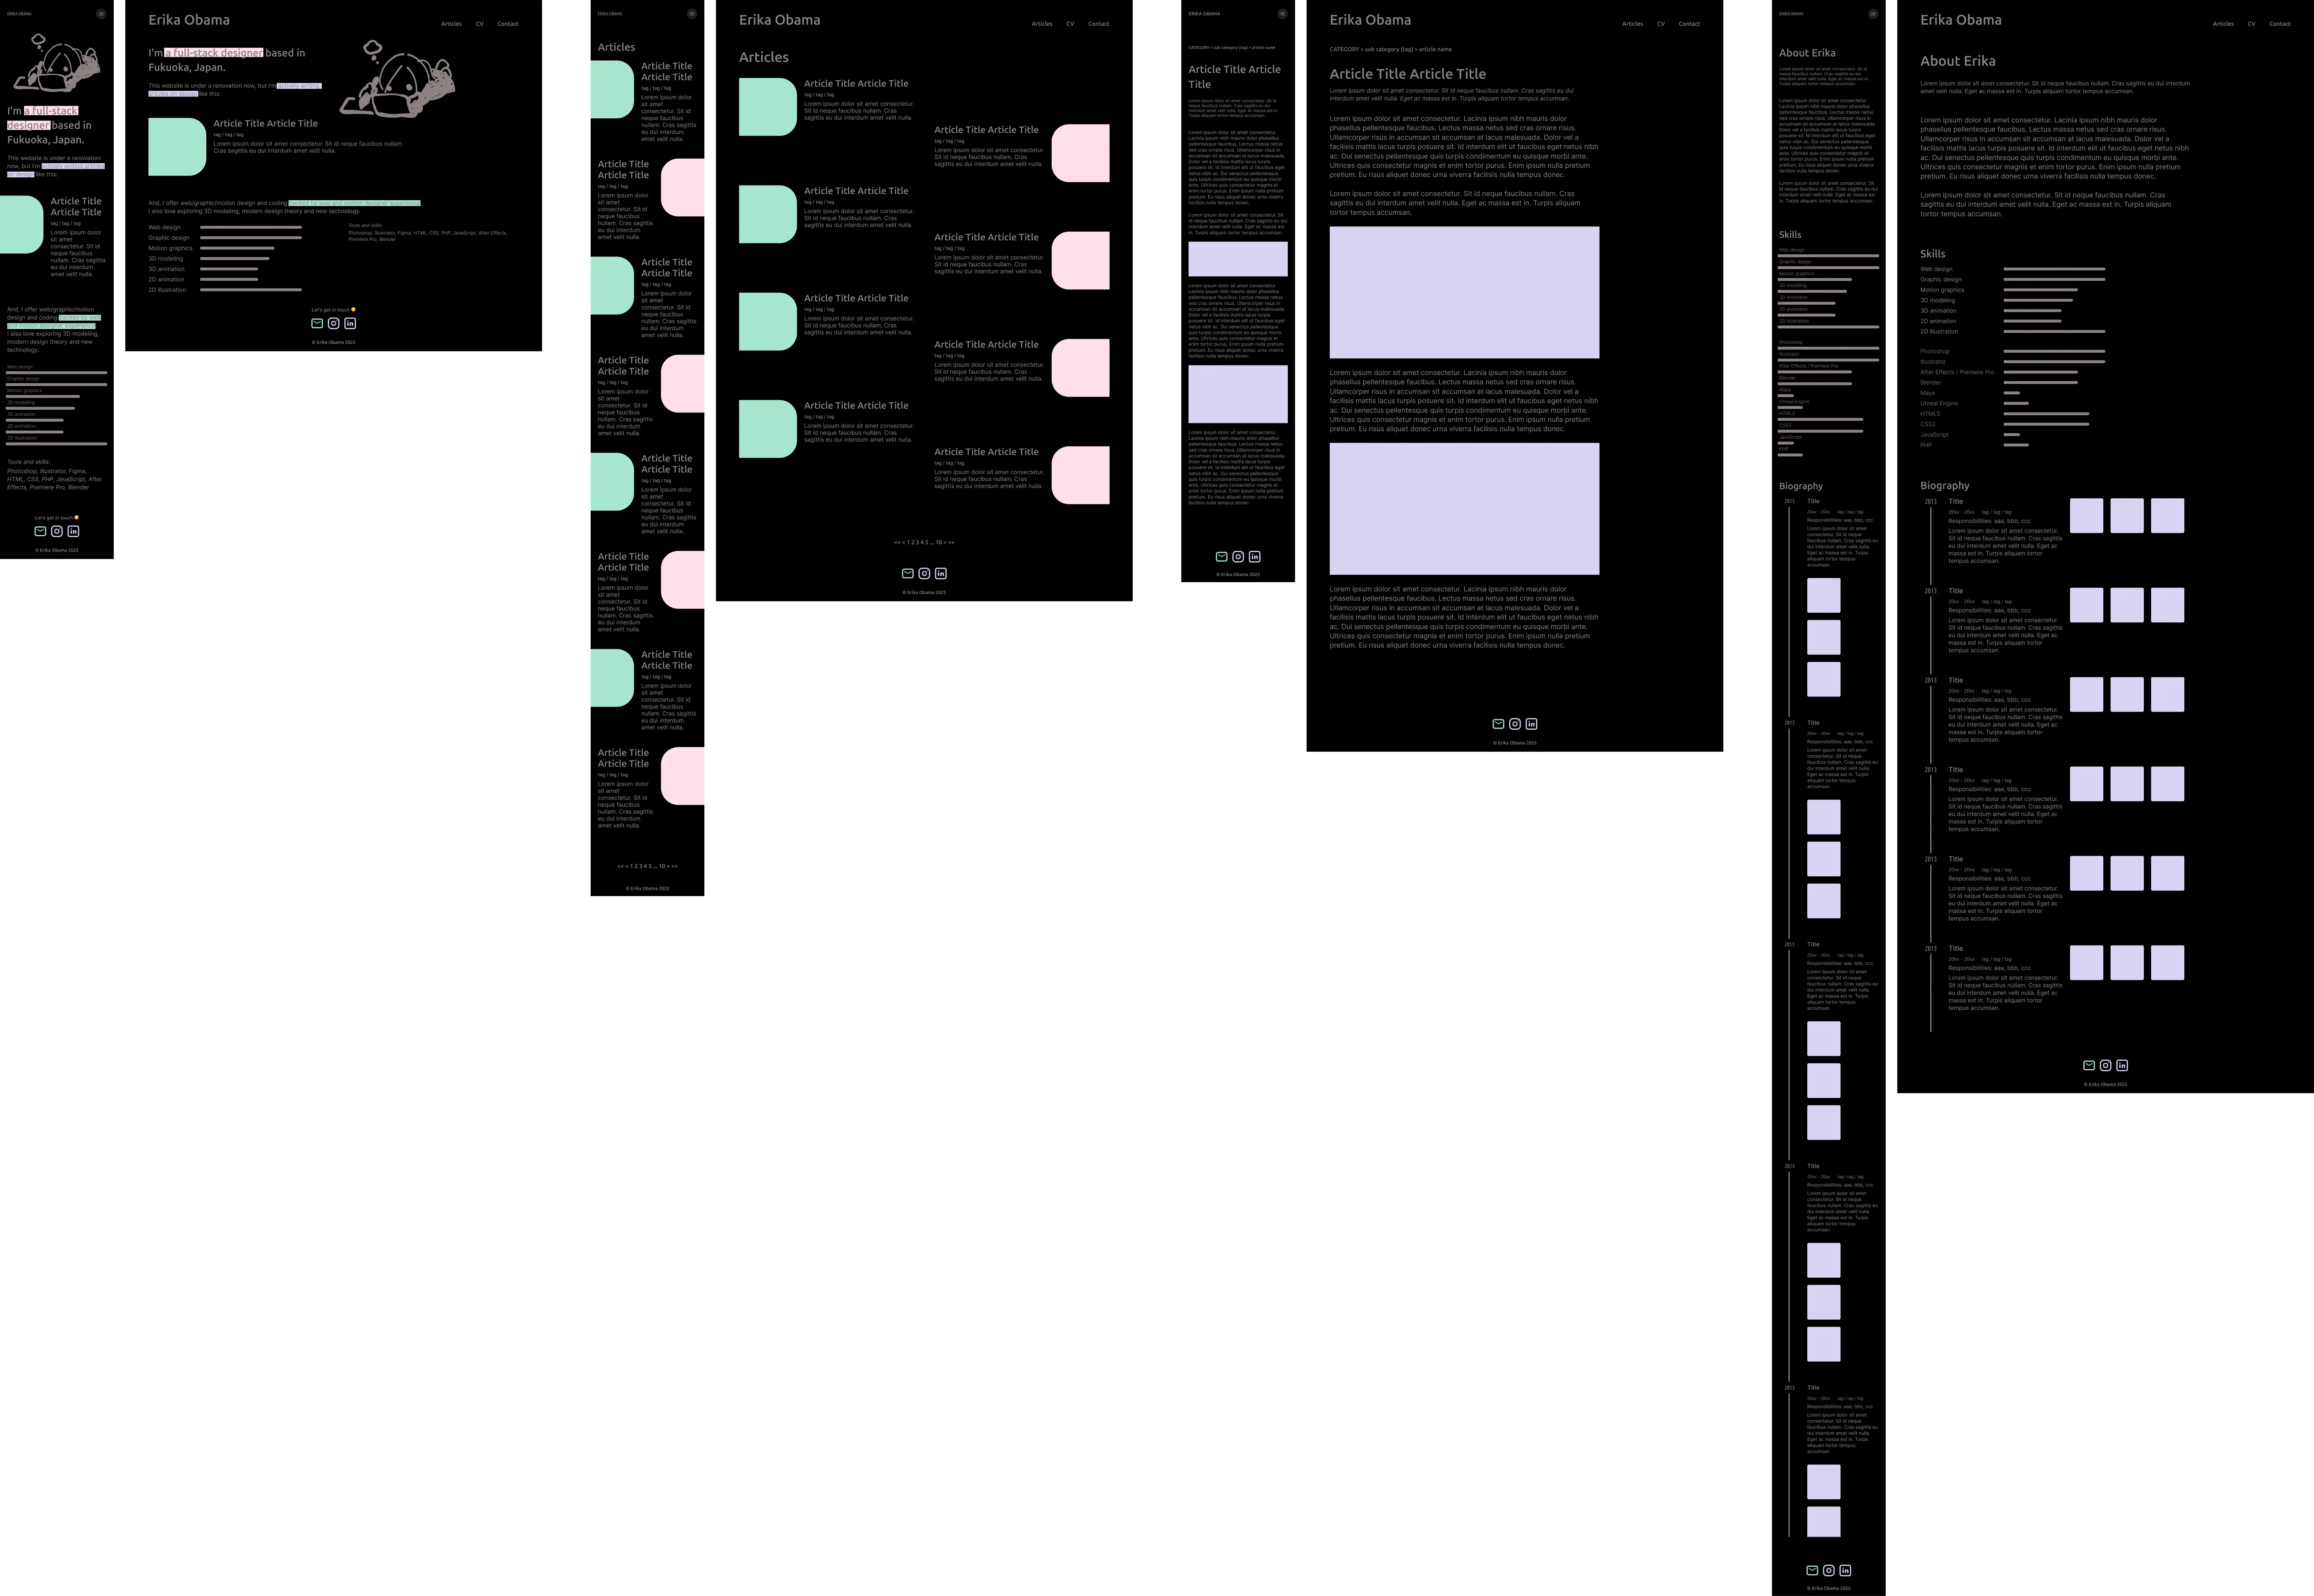
To test if the sketched design and color scheme actually work, and to finalize them, I made PC/mobile views for each page on Figma.
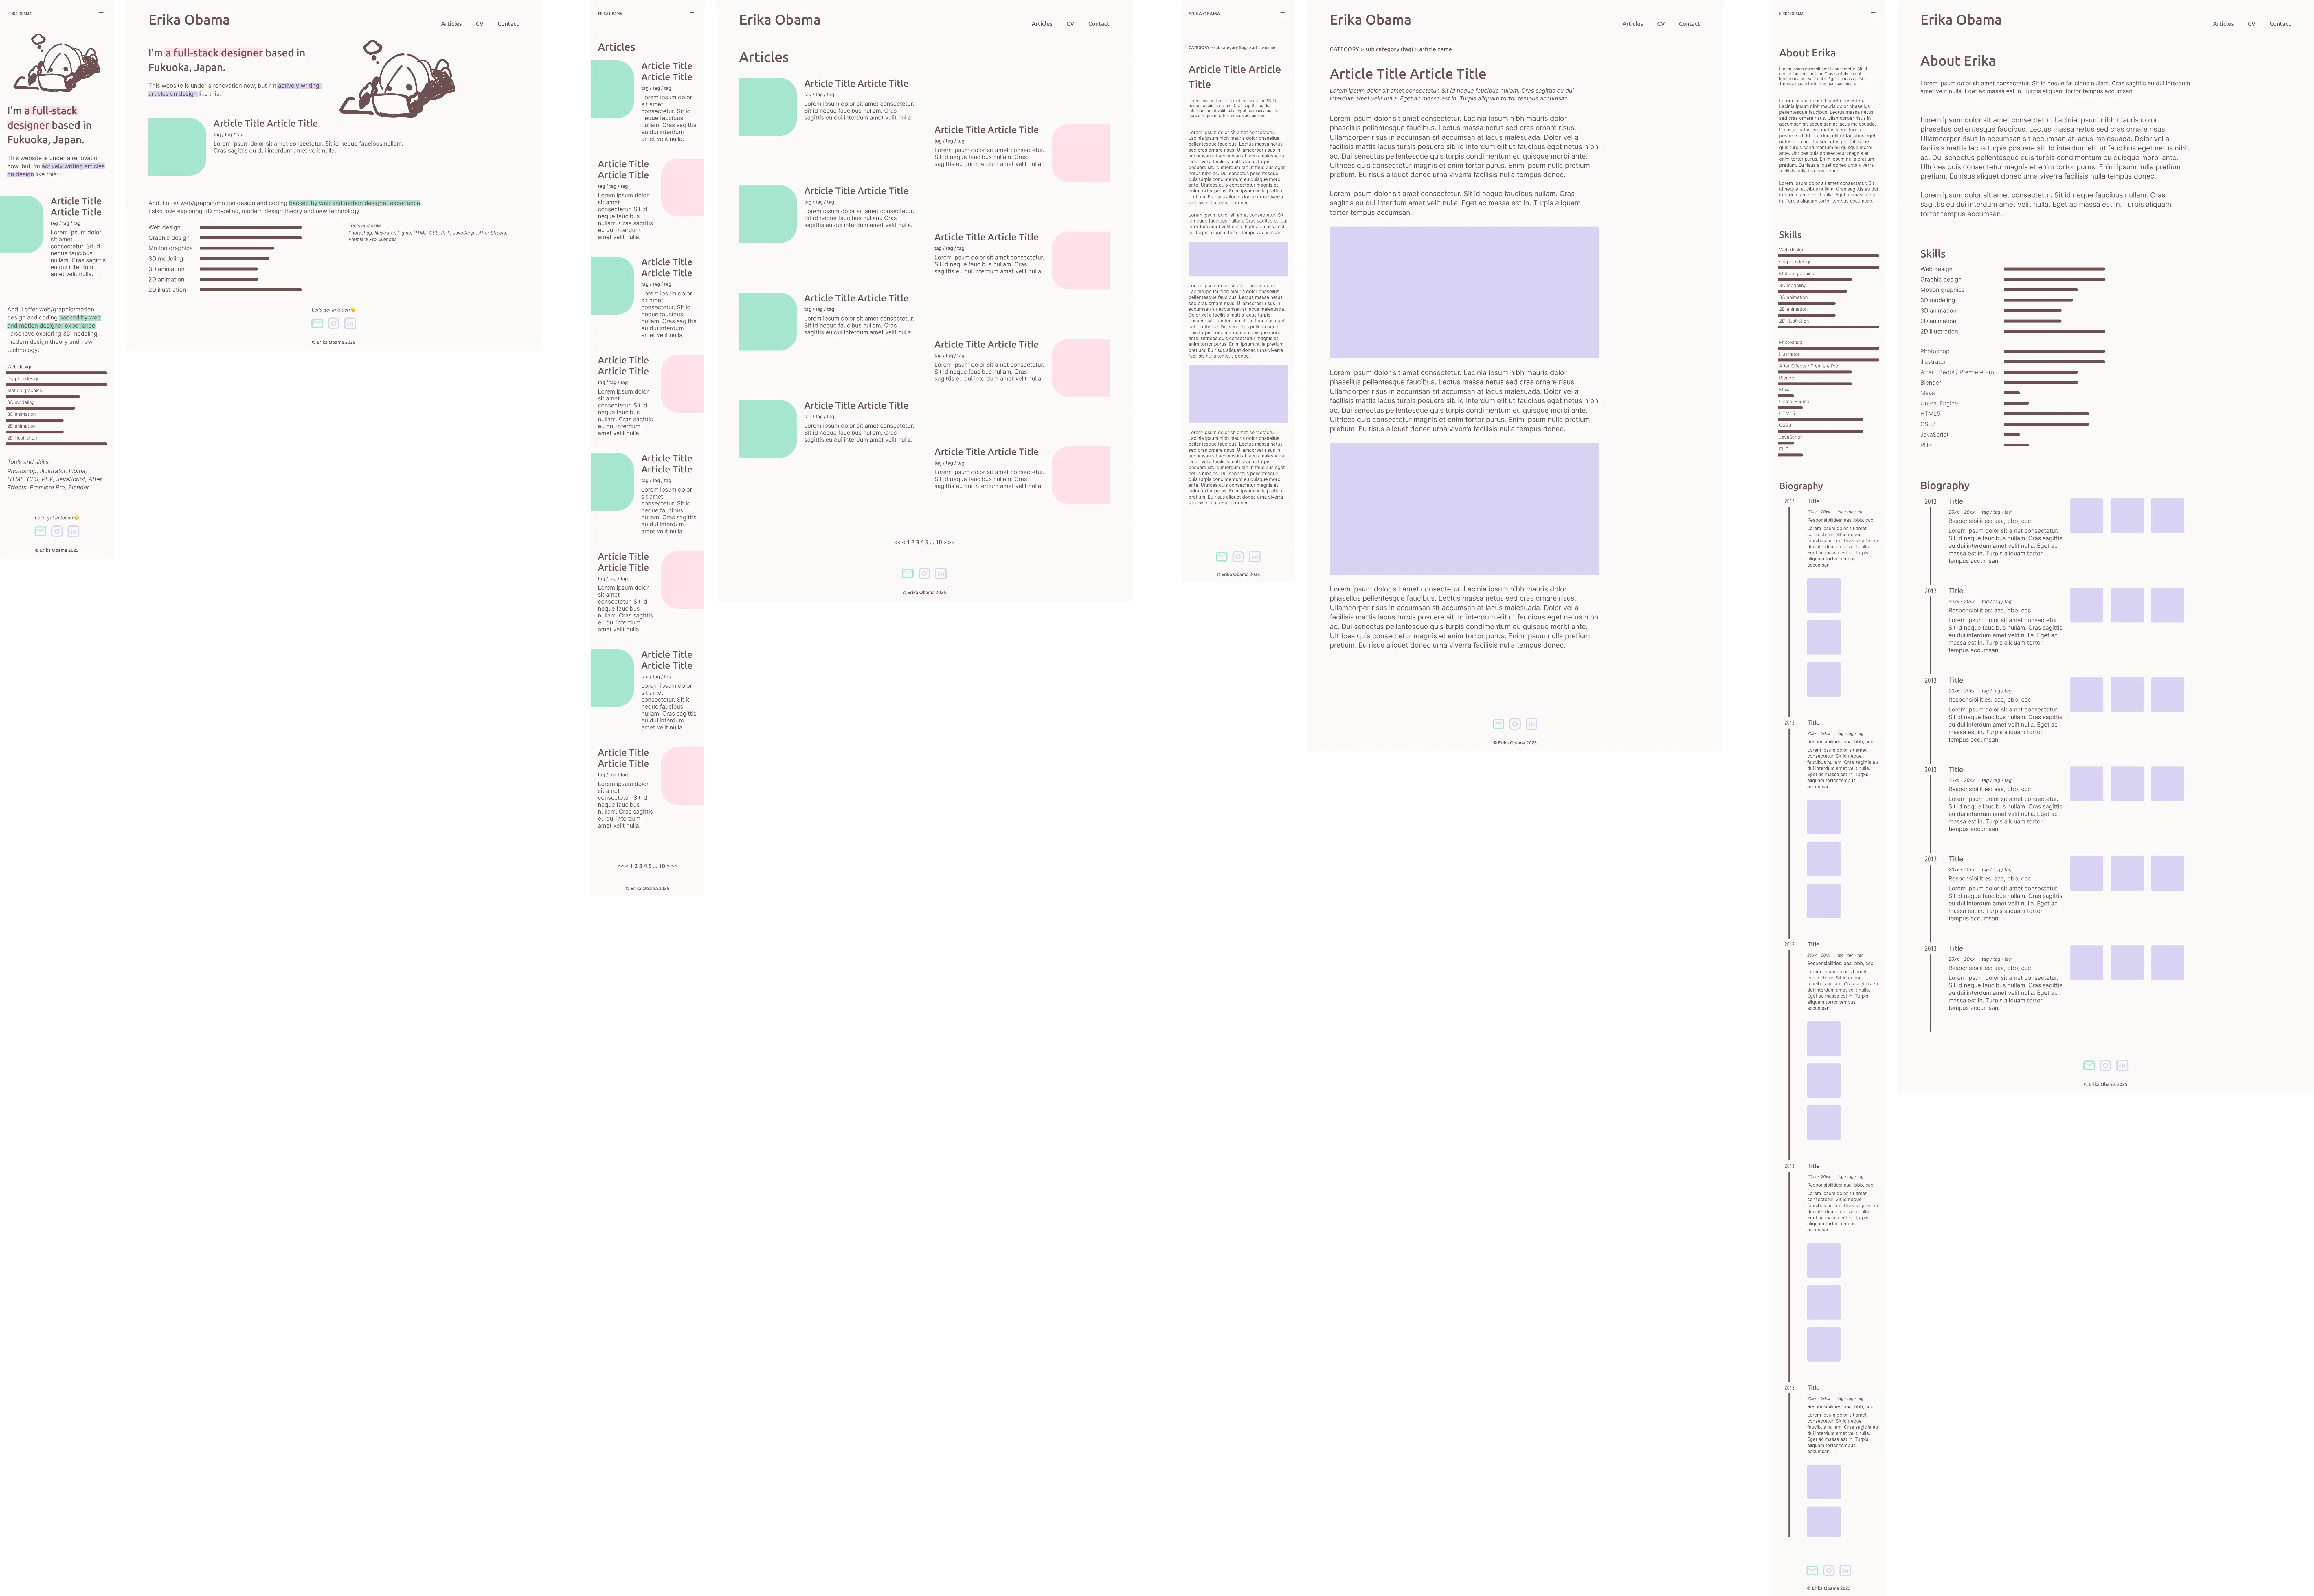
4. Code (Astro)
After deciding on the final look, I modified the sample website that I made by following a tutorial.
First, I added additional integrations:
- Tailwind CSS for easy, rapid development.
- Tailwind CSS Animated to add an analog and personal feel to the website.
- i18n support to make it bilingual (English/Japanese).
Then, started by:
- Adding CSS variables (font family, colors, etc.) to global.css.
- Creating Astro components like header.astro, navigation.astro, and footer.astro for reusability.
Since I believe in reusable assets for effortless project production and less hassle website management, making the code reusable as much as possible was crucial. So, in this phase, I tried anticipating variables and components I would need as much as possible.
5. Deploy (GitHub → Cloudflare Pages)
After finishing coding, I deployed my website to Cloudflare Pages.
But, why Cloudflare Pages over Netlify which is recommended in the step-by-step tutorial? The reason is simple. Because (as of Feb 2025,) Cloudflare has much more data centers in Asia including Japan, while Netlify has a few. Speedy connection from anywhere is very important, especially when the website is image-heavy, and offers multiple languages from different parts of the world.
I took these steps to publish the website:
- Create a new GitHub repo.
- Sign-up to Cloudflare.
- Create a Cloudflare Pages project integrated with the GitHub repo, to automatically deploy the source code.
- Added a custom domain (erikaobama.com).
That’s it!